Nail Lacquer Review: All Laquered Up
Beauty Services is the most lucrative business in this world. You will see ladies cluttering beauty parlours and nail salons during the festive season especially during Chinese New Year.
As the gap between Lunar New Year and Valentines’ Day is extremely close this year, most ladies might have burnt a hole in their pockets on beauty services over these 2 occasions. For unmarried ladies, they are considered fortunate as their expenses can be covered by Ang Pows (Red Packets). But it will still be wise to spend prudently.
The most common issue we experience is that our manicures have chipped off during the first week of Chinese New Year – if you opt for gelish, perhaps your manicure can last you longer for 2 weeks. Based on the fact that fingernails actually do grow pretty fast, your gelish after 2 weeks might not look as good as compared to when it was initially done.
In order not to spend (unnecessarily) on my manicure, I will always opt to paint my nails myself and hence the purpose of today’s blog post will be on more on my sharing of my Nail Polish collection and some tips on application of nail polish.
Nail Polish Collection and Reviews
Base Coat – Poshé Nail Strengthening Basecoat
China Glaze Nail Lacquers (SGD18)
| China Glaze Nail Lacquers |
 |
| 625 For Audrey, 1039 Dance Baby, 1028 Optical Illusion, 1026 Prism |
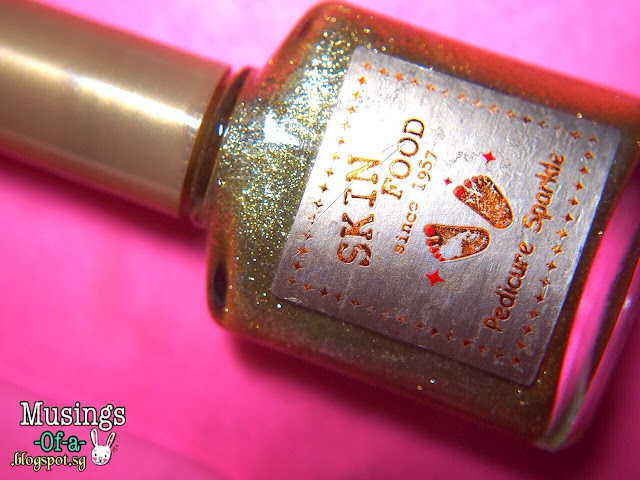
Skin Food Pedicure Sparkle (below SGD10)
| Skin Food Pedicure Sparkle in Gold, Pink and Pearl |
OPI Nail Lacquers (SGD20)
| My OPI Nail Lacquer Collection 2014 |
 |
| It’s a Girl! NL H39, Colour So Hot it Berns NL Z13, Elephantastic Pink NL142 |
My most favourite nail colour happens to be “It’s a Girl!” as it acts as the perfect base for french manicure. It has a very sheer pink finishing which you can opt to wear it alone during the days when you feel too lazy for nail arts. It gives you a sophisticated finish and it makes your nails looked as if it has just went for a french manicure as it made the tips of my nails appear whiter upon application.
My second favourite nail colour from the OPI collection is “Colour So Hot it Berns”. Not because I am hot or anything, just because I love how the red looks on my skin. This colour is very popular among flight attendants as it makes their skin appear fairer 🙂
Next in line would be “Elephantastic Pink” – it is a salmon-pinkish colour that is vibrant and pretty!
 |
| Pink of Hearts 2009 SR AL2, Can’t Find My Czechbook NL E75, Need Sunglasses? NL B46 |
 |
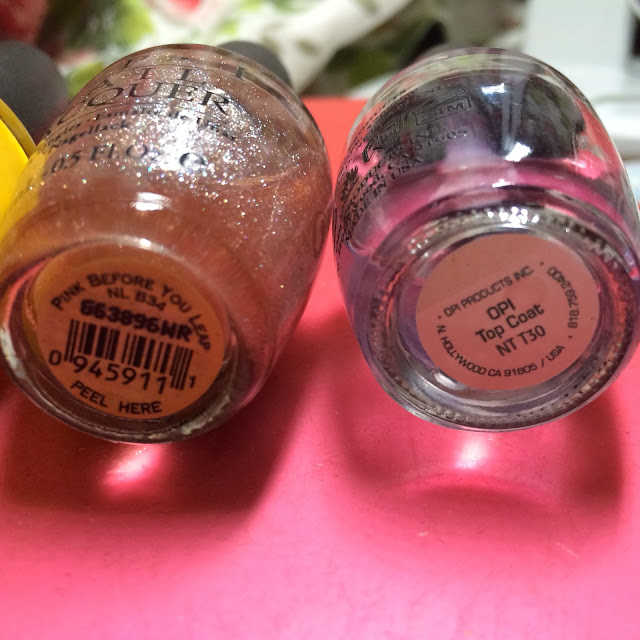
| Pink Before You Leap NL B34, OPI Top Coat NT T30 |
Past Works
 |
| Nail Art #1: Pastel Pokla Dots |
 |
| Nail Art #2: Watermelon Inspired Nails |
 |
| Nail Art #3: Vintage Floral Nail Art inspired by Bubzbeauty 🙂 |
 |
| More Vintage Floral Nail Art designs in Pastel Pink 🙂 |
 |
| My Nail Art Designs for Chinese New Year 2013 – Pokla Dots and Vintage Flowers 🙂 |
 |
| Playing around with my fav Red Shade from OPI |
 |
| My Nail Art Design for my Tokyo Trip in April 2013 – To match the Sakura Season 🙂 |
 |
| My Nails for Chinese New Year 2014 – Floral Designs on thumb and classy french tips with my ring finger dipped in gold dust |
Nails for Valentines’ Day 2014!
Products Used:
- Poshé Nail Strengthening Basecoat
- Bourjois Paris 1 Seconde Gloss in Shade 6402 (bright turquoise / teal shade)
- OPI Nail Lacquer in Elephantastic Pink NL142
- Skin Food Pedicure Sparkle in Gold
- Bourjois Paris 1 Seconde Gloss Shine Booster Top Coat
 |
| Bourjois Paris 1 Seconde Gloss in Shade 6402 |
 |
| Bourjois Paris 1 Seconde Gloss in Shade 6402 and OPI’s Elephantastic Pink NL142 |
 |
| Skin Food Pedicure Sparkle in Gold |
Finished Product:
 |
| TaDahhhh! My finished nails for the upcoming Valentines’ Day! |
 |
| Time to do some blogging on my Macbook Pro… |
The Downside
 |
| Bubbles on my Middle Finger 🙁 |
 |
| Bumpy finishing |
Tips on Applying Nail Lacquer
- Ensure that your cuticle is tucked neatly away from the sides of your nails using a cuticle pusher (you can easily purchase it from Qoo10) – this enables you to have a wider surface area to apply your nail polish and hence prevent the staining your cuticles too
- If you have rough ridges on your nail surface, you might want to give it a good buff (of course this is optional)
- Remember to apply a good Base Coat to protect your nails and prevent it from yellowing
- Apply your nail varnish in very light strokes. I prefer to apply some on the tips of my nails first before applying boldly from bottom to top – this makes application easier somehow 🙂 The key is that you must apply in very light strokes if you do not want to see brush marks appear on your dried varnish…
- Do not apply more than 2 layers of nail polish. Applying more than 2 coats makes your nails very chunky and the nail will be varnish harder to dry as well. A good nail lacquer is able to produce a opaque colour upon its first 2 applications.
- Apply a layer of top coat to seal your nail colour and prevent it from chipping when your nail colour is completely dry.
Easy NailArt Tutorials from Bubzbeauty
Vintage Floral Nails
Sweet Dessert Nails
Bride ‘n’ Groom Nails
I do hope that my review is of use to you and hope you will enjoy your Valentines’ Day looking gorgeous and being loved!
Check out my nailart tutorial for my pre-wedding photoshoot here (click on photo below to proceed):


Post a Comment